1. Get the blocks that you are going to use. I worked with two different sizes and they both worked really well. I did like the 3 x 3.5 inch blocks a little bit better than the perfect cubes. It made it easier to have more space for the pictures on the size. This is just a preference though. The ones I used were sanded and had the edges rounded off.
2. I painted all the edges of the blocks the color that I wanted the base to be. Let dry.
3. Not all of the blocks I used were exactly the same size so I made sure that I measured each block then the pictures and papers that I was going to use to those measurements. I just used different scrapbook papers. I found that the thicker kind worked a little bit better and were less prone to wrinkling, but the other kind works as well.
4. Put a layer of mod podge on the block and lay the paper/picture on it. I rubbed them down thoroughly to make sure that there weren't going to be any bubbles underneath. Make sure that you don't go super crazy with the mod podge because you don't want the pictures or papers to wrinkle.
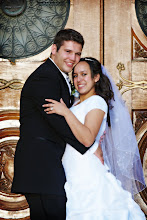
 Here you can see the painted edges, an example of a paper, and picture.
5. Once you've done this for all of the sides, make sure that everything has had a chance to dry. Put a final layer of mod podge on the top of the pictures and paper. I used the matte pod podge for the bottom layers and the paper, but used the glossy mod podge for the top of the pictures. It doesn't really matter what you use, I'm just very particular about what my stuff looks like. Both matte and glossy look good for everything.
6. For the letters I just bought some of the foamy 3-D letters to put on, but I imagine you more crafty people can think of more creative ways of doing letters or whatever you're doing with them.
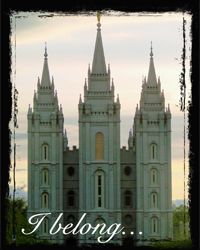
 This is one of the blocks for my sister in law and her family. I cut out the stars from the same paper that I used on top.
 7. You can add whatever you like to them. Some people's I used stickers, some I cut out thick, glittery paper for stars and flowers, and others I used little, fake flowers.
 This is the one I made for my family.
 This was a really fun project for me. I'm not a particularly crafty person although I would like to be. It took a little more time than I anticipated, but then again I did end up doing about 52 blocks in a couple week period. But they're really easy and really cute. (If I do say so myself.)


No comments:
Post a Comment